details / how to use
details / how to use
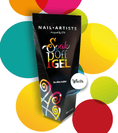
SoakOFF.PGel White
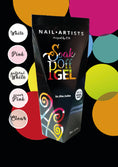
Entdecken Sie die nächste Generation der Nagelmodellage mit unserem neuen SoakOFF.P.Gel. Unsere verbesserte Formel bietet nicht nur eine außergewöhnliche Qualität und Haltbarkeit, sondern ist auch in fünf atemberaubenden Farben erhältlich, die Ihre Kreativität auf ein neues Level heben.
Auf Basis wertvoller Kundenrückmeldungen haben wir das SoakOFF.P.Gel vollständig überarbeitet, um Ihnen ein Produkt zu bieten, das einfach in der Anwendung ist und gleichzeitig professionelle Ergebnisse liefert. Die verbesserte Konsistenz ermöglicht eine präzise und einfache Verarbeitung, was das Gel ideal für sowohl Anfänger als auch erfahrene Nageldesigner macht.
Anwendung:
- Bereiten Sie die Nägel wie gewohnt vor.
- P.Gel auftragen: Wählen Sie die gewünschte Farbe und verwenden Sie den speziell entwickelten Pinsel, um das Gel gleichmäßig aufzutragen. Beginnen Sie an der Nagelspitze und arbeiten Sie sich zur Nagelhaut vor.
- Gel modellieren: Verwenden Sie den Pinsel, um das Gel in die gewünschte Form zu bringen. Bei Bedarf können Sie kleine Mengen des Gels hinzufügen, um Unregelmäßigkeiten auszugleichen.
- Aushärten: Lassen Sie das Gel unter einer UV- oder LED-Lampe entsprechend den Herstellerangaben aushärten. Die genaue Zeit kann je nach Lampe variieren.
- Nägel formen: Nach dem Aushärten bringen Sie die Nägel wie gewohnt mit einer Feile in Ihre gewünschte Form.
Anwendung mit Reverse.NailTip.FORM:
Bereiten Sie die Nägel wie gewohnt vor.
- Auftragen des Gels: Schablone vorbereiten: Wählen Sie den passenden Reverse.Nail.Tip für den jeweiligen Nagel aus. Stellen Sie sicher, dass die Schablone sauber und frei von Staub oder Öl ist.
- Gel auf die Schablone auftragen: Tragen Sie eine dünne Schicht des SoakOFF.P.Gels gleichmäßig auf die Innenseite der Reverse.Nail.Tip Schablone auf. Achten Sie darauf, dass das Gel bis zu den Rändern reicht, aber nicht überläuft.
- Schablone auf den Nagel platzieren: Sobald das Gel aufgetragen ist, positionieren Sie die Schablone vorsichtig auf dem Nagel, indem Sie sie vom Nagelbett zur Spitze hin anpressen. Stellen Sie sicher, dass keine Luftblasen entstehen und das Gel gut am Nagel haftet.
- Lassen Sie das Gel unter einer UV- oder LED-Lampe aushärten.
- Ziehen Sie die Schablone vorsichtig ab, nachdem das Gel vollständig ausgehärtet ist.
- Nägel formen: Nach dem Aushärten bringen Sie die Nägel wie gewohnt mit einer Feile in Ihre gewünschte Form.
Discover the next generation of nail sculpting with our new SoakOFF.P.Gel. Our improved formula not only offers exceptional quality and durability, but is also available in five stunning colors that will elevate your creativity to a new level.
Based on valuable customer feedback, we have completely revamped SoakOFF.P.Gel to provide you with a product that is easy to use while delivering professional results. The improved consistency allows for precise and easy application, making the gel ideal for both beginners and experienced nail designers.
Application:
- Prepare the nails as usual.
- Apply SoakOFF.P.Gel: Choose your desired color and use the specially developed brush to apply the gel evenly. Start at the tip of the nail and work towards the cuticle.
- Model the gel: Use the brush to shape the gel into the desired form. If necessary, you can add small amounts of gel to correct any irregularities.
- Cure: Cure the gel under a UV or LED lamp according to manufacturer's instructions. The exact time may vary depending on the lamp.
- Shape the nails: After curing, shape the nails as usual with a file.
Application with Reverse.NailTip.FORM:
Prepare the nails as usual.
- Applying the gel: Prepare the form: Select the appropriate Reverse.Nail.Tip for the respective nail. Ensure that the form is clean and free of dust or oil.
- Apply gel to the form: Apply a thin layer of SoakOFF.P.Gel evenly to the inside of the Reverse.Nail.Tip form. Ensure that the gel reaches the edges but does not overflow.
- Place the form on the nail: Once the gel is applied, carefully position the form on the nail by pressing it from the nail bed to the tip. Ensure there are no air bubbles and the gel adheres well to the nail.
- Cure the gel under a UV or LED lamp.
- Remove the form carefully after the gel has fully cured.
- Shape the nails: After curing, shape the nails as usual with a file.
Reviews
Reviews
Shipping Policy
Shipping Policy
Shipping Origin and Forwarder:
-> All shipments are dispatched from Germany and processed by GLS, our designated forwarder.
Shipping Costs:
-> Shipping costs are calculated individually and displayed during the checkout process. All charges include applicable legal taxes.
Delivery of Downloadable Products:
-> For downloadable products (digital content not delivered on a physical medium), no shipping costs will apply. These products can be accessed via a download link provided in your email.
Delivery Terms:
-> Order Dispatch: We will dispatch your chosen items to the address provided during checkout as soon as your order is placed and payment is received.
Address Accuracy:
-> Please ensure that the address provided during registration or checkout is correct. We are not responsible for delivery issues due to inaccurate or unattended addresses.
Shipping Timeline:
-> Purchased items are typically shipped within 3 to 4 business days. Most orders are delivered within 4 to 6 business days, excluding Sundays and public holidays.
Multiple Products with Varying Delivery Terms:
-> If your order includes products with different delivery timelines, we will ship them together in a single package, unless otherwise agreed. The delivery time will align with the product that has the longest delivery term.
Payment Methods
We offer the following secure payment options:
- Credit Card
- Bank Transfer
- Cash on Delivery (to the courier)
- PayPal
For any further questions or assistance regarding your shipment, please feel free to contact our customer support team. We’re here to help!"

- VON PROFIS ENTWICKELT UND GETESTET
- VIELFÄLTIGE UND QUALITATIV HOCHWERTIGE PRODUKTE
- SPARSAM IN DER ANWENDUNG
- STILVOLLE VERPACKUNGEN


